Let us start with classic ideas of how brands are using WebAR Image Tracking to create AR experiences that enrich their brand promotion, marketing, and sales growth:
- Display products in unique ways
- Explain technology/complex ideas in simple ways
- Entertain the target audience
- Product advertisement
Also, because experiences are delivered over a web browser, users don’t have to install additional applications. Hence, brands use this technology to reach their target audience, getting an overwhelming response.
In this blog, we will explore everything about image tracking WebAR and how brands use this technology to their advantage.
So, let’s dive in.
What is image tracking WebAR?
Image tracking WebAR allows users to view augmented content on their browser by tracking an image. The image acts as a trigger to produce the overlaid digital content on a 2D image.
So, how does it happen?
Let’s explore the technology that enables image tracking to trigger the AR experience.
What are the technical requirements of image tracking WebAR?
The technical requirements of “Web AR image tracking” are pretty simple. As the name suggests, “WebAR Image Tracking,” your device must detect and track an image or a drawing to see its supplemented content.
If you are using a smartphone to scan the image, it should have advanced sensors and an RGB camera. Also, it should have an intelligent gyroscope accelerometer to view the WebAR experience on the browser properly.
Regarding browser compatibility, if you are accessing image-tracking WebAR on your Android device, the browser must support WebXR. It is an API that enables a mobile device to access the AR experience on the browser without installing additional applications.
iOS, on the other hand, comes with an “AR Quick look” developed with ARkit. And, you can easily view brilliant quality AR experience on the Safari browser.
How does it work?
With WebAR image-tracking, the idea is to synchronize the real-world object with virtual assets like 3D models, text, images, and animation clips.
Hence, the first step in the process is to ensure your device’s camera can accurately detect the image position and orientation. Next, the camera stream must provide the required perspective and Field of View (FOV) to add augmented objects to the real-world object.
It was all about viewing image tracking with the WebAR image recognition technique.
Now, the most obvious question is, how do you create one?
You can seamlessly create a Web-based image tracking AR experience on PlugXR, a no-code platform with all essential integration.
Getting started with PlugXR
You can create a more user-friendly and functional AR experience on PlugXR. To create a Web AR image tracking experience on PlugXR, follow the steps below:
1. First of all, add a new Web AR image tracking project.
- Clicking (+) on WebAR (Image Target) on the PlugXR dashboard.
2. Choose your marker
Fill in your marker name and upload the marker.
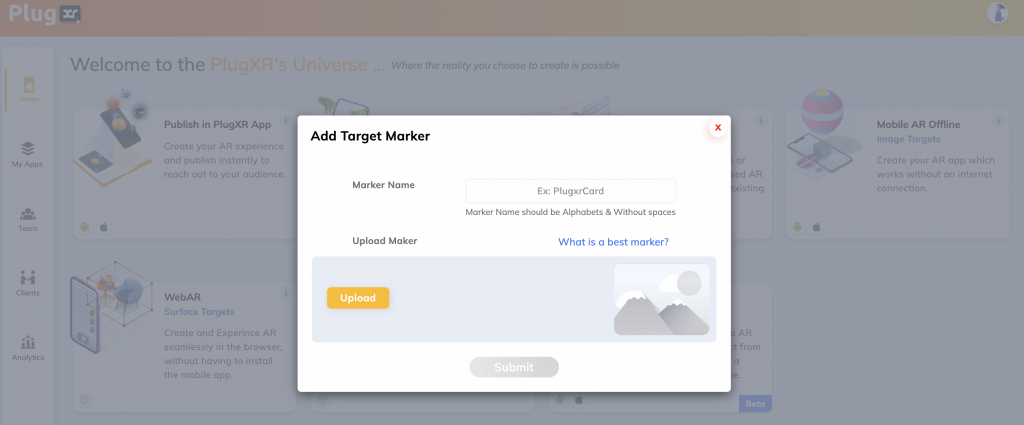
Since you want to create an image-tracking WebAR experience, you must choose a good marker to ensure your AR experience is immersive and of great quality.
Attributes of a good marker:
A marker is good if it has the following features-
- Good contrast
- Good brightness
- No repetitive pattern
- Rich in details
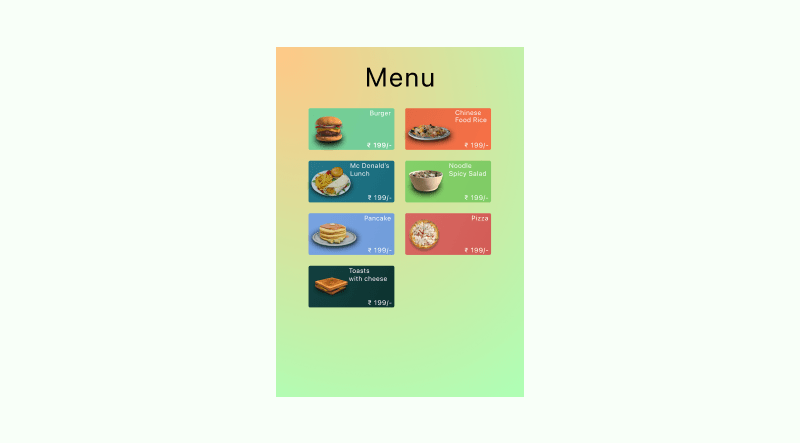
An example of a good marker:
3. Add digital content
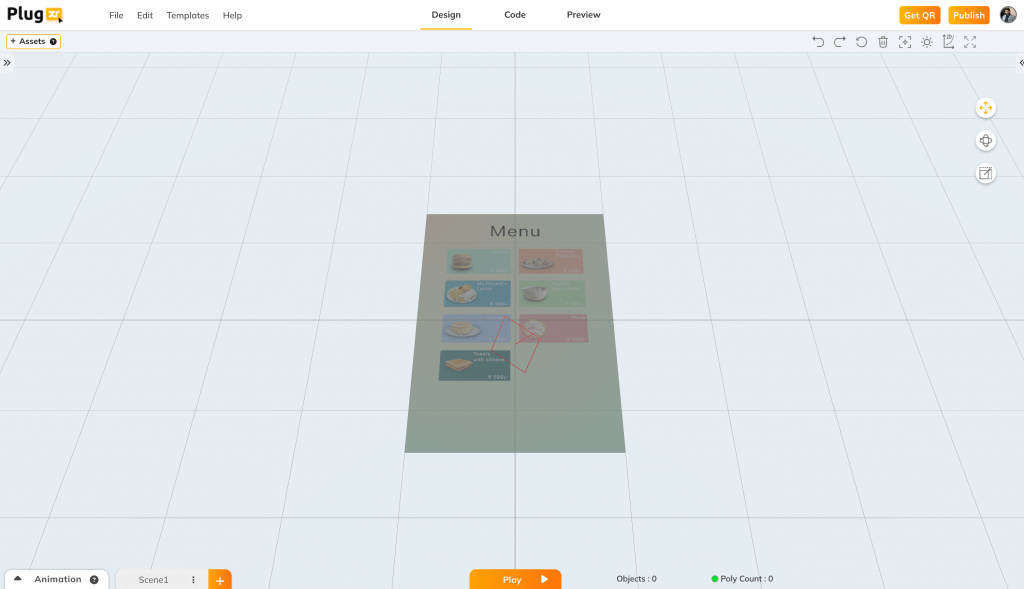
- Now, it is time to add digital content to your marker and make it a fun experience.
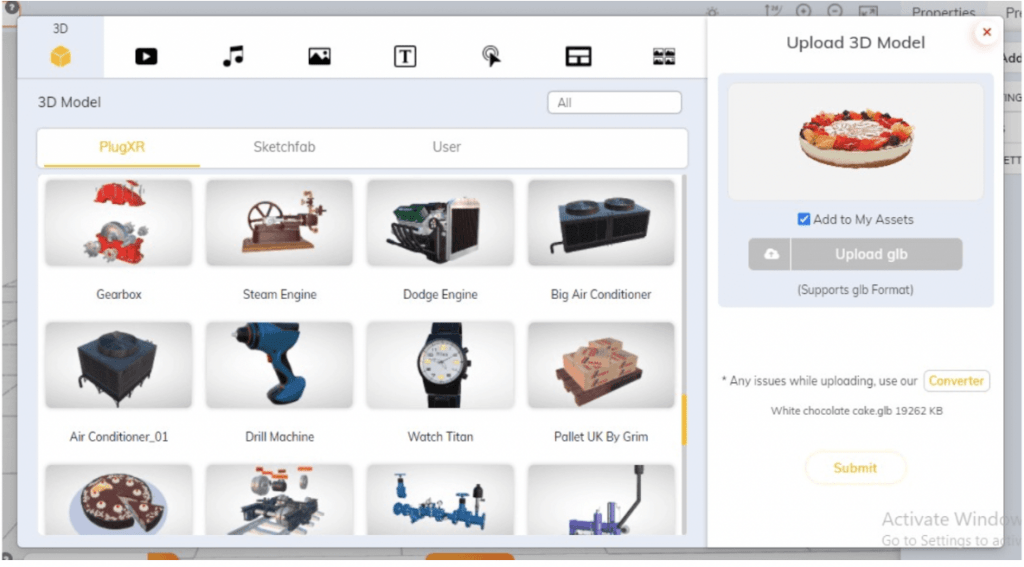
You can upload your own content or use the PlugXR asset library, consisting of 3D models, videos, audio, images, texts, buttons, widgets, and many more.
4. Customise content experience
Adjust your content properties to customize the experience. With PlugXR, you can adjust properties and fix the position and orientation of media elements.
You can adjust the size, and position, move, rotate, and scale the object per your wish.
Other control features include – 2D/3D view, Zoom In View, Zoom Out View, Full Screen, Delete, Reset, Focus, and Center.
5. Save and Publish
On creating the experience, “Save” and “Publish” your work.
6. View your experience
Now, you can see your experience by detecting the image (marker) with your device camera.
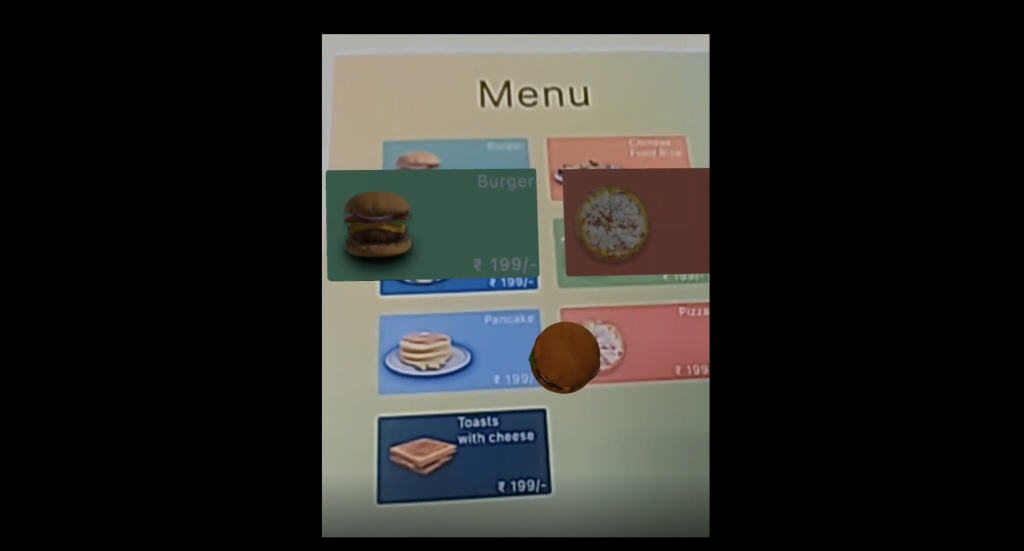
Web AR Image tracking examples:
We tripped on some interesting examples of Web AR image tracking and compiled them for you here.
- Asda Wagyu steaks recipe
Asda is a leading British supermarket chain that integrated AR into its line of Wagyu steaks. In 2021, it created an image-tracking WebAR experience where people could scan the packaging to access AR video on steak recipes on their phone browser.
- KHAITE’s Lookbook
KHAITE’s Spring-Summer 2021 collection lookbook was a commendable example of WebAR experience through image tracking. The fashion brand allowed its users to scan the QR code associated with each product in the Lookbook to view in 3D, in different orientations and angles.
- Porsche Taycan
In the 2020 September and October release of the popular German magazine Auto Motor Sport, an advertisement for Porsche Taycan was featured. The advertisement was activated for the WebAR experience through image tracking. Anyone could scan the image to see a 3D view of the car on their phone’s browser. Also, people could rotate the car model to view it from different angles, change the color, and have a closer look to see the details.
WebAR Image tracking has opened many opportunities for brands to develop unique and innovative ways to promote their business. With PlugXR, create a Web AR image tracking experience accessible within the browser. The reach will be exponential, and the experience will be much smoother to create an everlasting impression.
Why use PlugXR for creating web AR image tracking experiences?
On PlugXR, a no-code/low-code platform, creating an experience using WebAR image tracking is easier than the traditional method. You can create immersive applications in minutes.
What makes PlugXR tool the best option:
- User-friendly interface
- Powerful features
- No code, no dependency
- Hasslefree experience building
- Effective customer support
